6 Postpartum Ab Exercises For a Tighter Tummy
Have you recently had a baby and wondering what exercises can help you strengthen and tighten your tummy?
I hear ya!
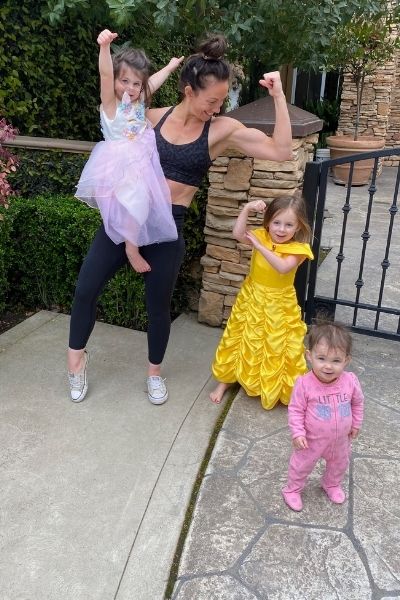
As a mom of three, I know the struggle is real.
But diving head first into ab exercises after pregnancy without taking the time to heal your core is only a recipe for disaster and frustration.
In this post, you will learn the benefits of a strong core (outside of appearance), and how to safely train your core after pregnancy to achieve the results you are looking for.
Can You Really Tighten Your Tummy After Pregnancy?
Yes!
Not only is it possible, it is also super important.
One of the most important areas to focus on building strength after having a baby is your core and many moms underestimate the importance of having a strong core.
Sure, many of us want to tone and tighten our tummy after having a baby but there is much more to the core than just appearance.
From carrying your baby in a baby carrier to breastfeeding, having a strong core is important in reducing back pain, improving posture and having an overall feeling of strength and confidence.
The core is made up of multiple muscles that not only help you move but they also help keep you standing upright, support your back, and protect your organs.
This means that you work your core in almost every exercise and movement you do and a weak core can wreak havoc on your body!
How Often Should You Train Your Core?
Like most things in the fitness world, it depends.
Things like how long it has been since your last baby, if you have abdominal separation, urinary incontinence or pelvic pain will all determine the level and frequency of your core workouts.
Overall, I recommend light, core activation, stability and postpartum rehab exercises most days of the week. Especially until you get those muscles firing and working properly.
These exercises are very gentle and include things like pelvic tilts, heal slides, dead bugs.
You can read more them here.
Then, to get an even stronger core and get the most out of your workouts, you should consistently practice designated core workouts like this about three times a week to really fire up those muscles.
I love to this routine before my workouts to really fire up my core and get my abs engaged to support my workout.
Short on time? This is also a great workout to do on it’s own!
Postpartum Recommendations
Before diving into these exercises, I strongly suggest you take the time to assess your core readiness.
While I know you are eager to see results and tighten your postpartum tummy, you can actually do more harm than good by not progressing slowly.
When the core muscles are not healed properly after having a baby, improper core exercises can actually make your stomach look bigger by worsening any abdominal separation.
6 Exercises to Tighten Your Tummy After Baby
Suggested Equipment
- Yoga mat
- Exercise Ball
- Interval Timer on your phone
Workout Instructions
- Set an interval time for 45 seconds work and 15 seconds rest. I have members of my Tone-in 10 community use a free Gymboss Timer app.
- The exercises are broken up into three groups of 2 exercises each.
- You will complete 3 sets of each exercise in the group before moving onto the next group of exercises. Each group should take about six minutes.
- Rest 30 seconds before moving to the next group of exercises
The Exercises
Superset #1
- Seated Ball Marching OR Glute Bridge Marching (depending on your strength & stability)
- Start with Seated Ball Marching if you are unsure about your core strength. If that feels right, then move to Glute Bridge Marching on your next set
- Alternating Arm Deadbug (with or without exercise ball)
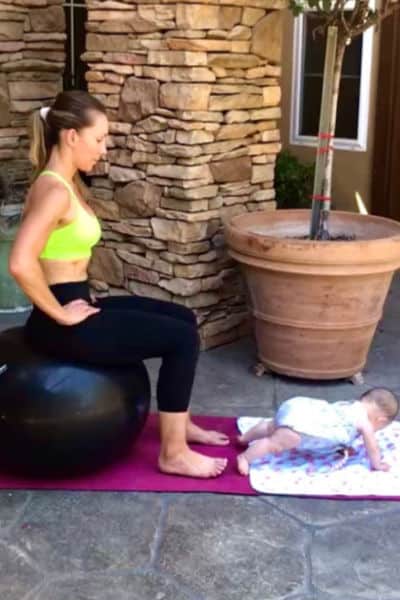
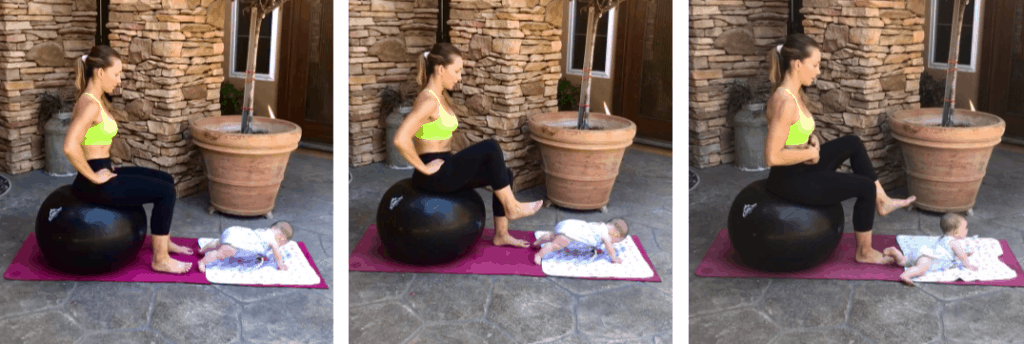
1a. Seated Exercise Ball Marches
- Begin seated comfortably on a stability ball
- Sit tall and engage your core. Ribs and shoulders down while slightly lifting up your pelvic floor with your core
- Lift your right knee up while maintaining balance on the ball. Hold for three counts, then slowly lower.
- Avoid dropping your left hip and keep pelvis straight
- Repeat on the left side and continue alternating back and forth.
- You may feel a little off balance at first but this is perfectly okay! This exercise is teaching you to gain control and support through your core.
- Most important thing is to move slow!
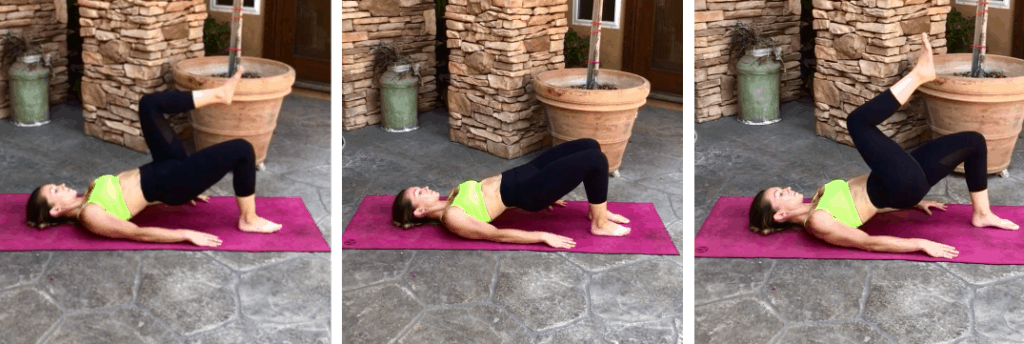
1b. Glute Bridge Marches
- Begin on your back with your knees bent and feet about hip-width apart and flat on the ground.
- Engage your core and drive your heals through the ground to bridge up. Squeeze your glutes and keep your core engaged. Do not over arch your back.
- Holding the bridge position, slowly lift one foot off the ground, bringing your knee in toward your chest. Focus on keeping the right glute and your core engaged to stay balanced.
- The key to this exercise is not to let your hips sag as you lift your leg. This requires both glute and core strength.
- Slowly lower your leg, readjust as needed and repeat on the opposite leg.
- If you cannot maintain balance and alignment as you bring your knee up, then start with simple heal lifts or only bring your knee as high as you can maintain form.
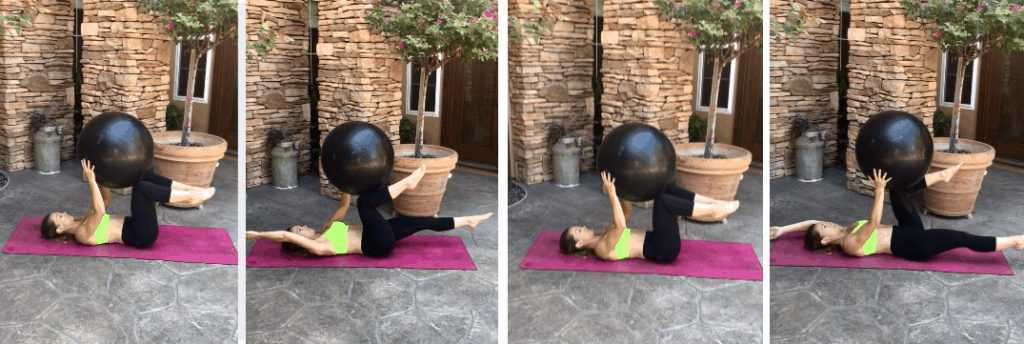
1. Dead Bug With Stability Ball
- Lie on your back holding a stability ball above your core with your knees and hands
- Engage your core by performing a simple pelvic tilt and pressing your back firmly against the ground.
- Take a deep breath in.
- As you exhale, slowly extend your left leg toward the floor and your right arm over your head and behind you while you hold the ball with your right leg and left hand.
- The key to this exercises is keeping your abs tight and focus on not allowing your lower back arch off the ground.
- Slowly return your arm and leg to the starting position.
- Repeat with your opposite arm and leg. Continue alternating.
- NOTES
- If using the stability ball feels too difficult, start by doing the same movements without the ball.
- To make this exercise more advanced, straighten the legs.
- If at any time your low back comes off the ground or you feel back pain, rest a moment and readjust your form.
Superset #2
- Knee Hovers OR Planks on Stability ball (depending on your strength & stability)
- Start with knee hovers if you are unsure. If that feels right, then move to stability ball planks on your next set
- Bird Dogs (spine stability exercise)
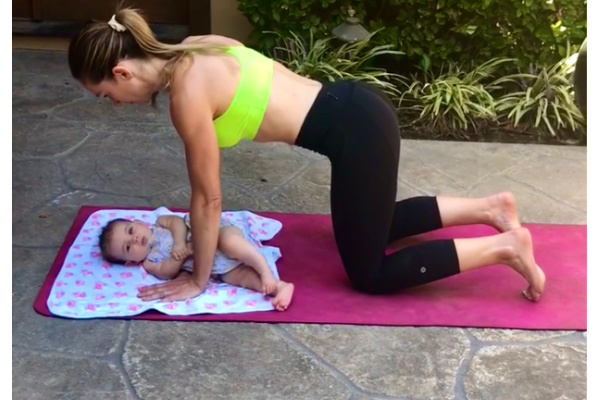
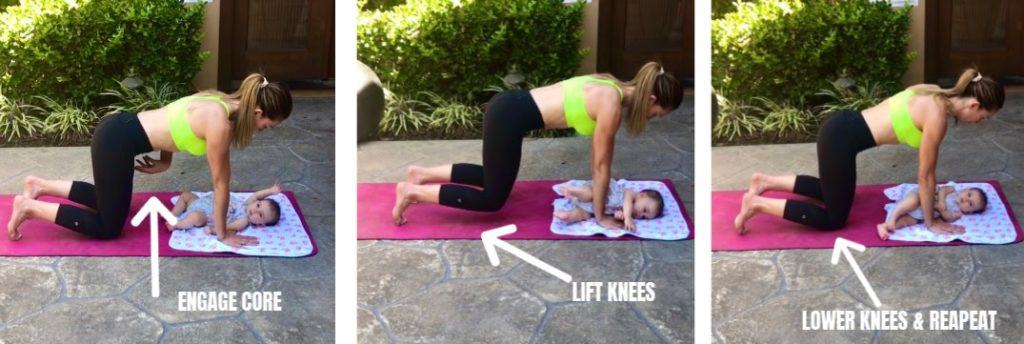
1a. Knee Hovers
- Begin on all fours with your spine neutral and your toes tucked
- Inhale to relax your core and pelvic floor
- As you exhale, engage your core by lifting up your pelvic floor with your abdominal muscles and brace your midsection.
- Once your core feels engaged, slowly press into your hands and lift your knees about one inch off the mat.
- The key to doing this exercise correctly is to avoid your abdominal muscles from disengaging or bulging as you lift your knees.
- Hold the position for a slow three count, then lower on the exhale.
- NOTE
- This is a great exercise to prepare you for a full plank
- Progress to a full plank once you no longer have any abdominal separation and your core feels strong.
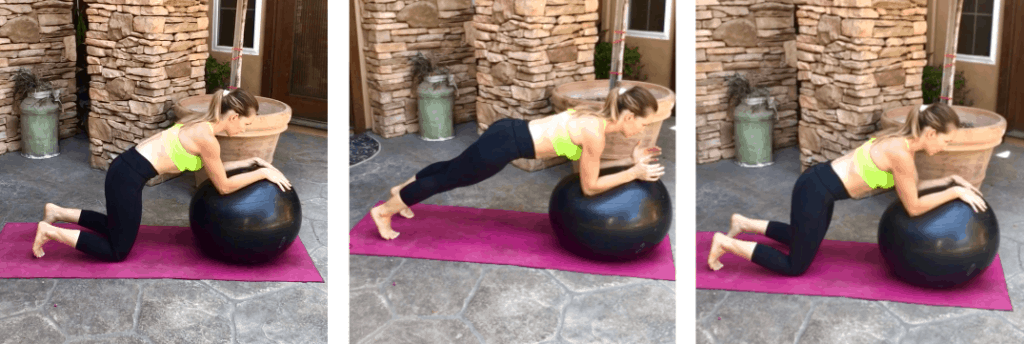
1a. Stability Ball Planks
- Once you have mastered the knee hovers, you can give this exercise a try
- Begin with your knees on the ground and forearms firmly on a stability ball in a plank position.
- Inhale to relax your core and pelvic floor
- As you exhale, engage your core by lifting up your pelvic floor with your abdominal muscles and brace your midsection.
- Once your core feels engaged, press your arms into the ball and slowly straighten your legs into a plank position.
- Hold this position for as long as you dont feel any bulging or back pain.
- However, if you feel or see any bulging in your core or feel pressure on your low back, rest your knees, readjust and start again.
- You can start by holding the plank position for 5 seconds, lower then repeat this up down movement for the duration of the interval.
- If you feel strong and stable, hold the plank for as long as possible!
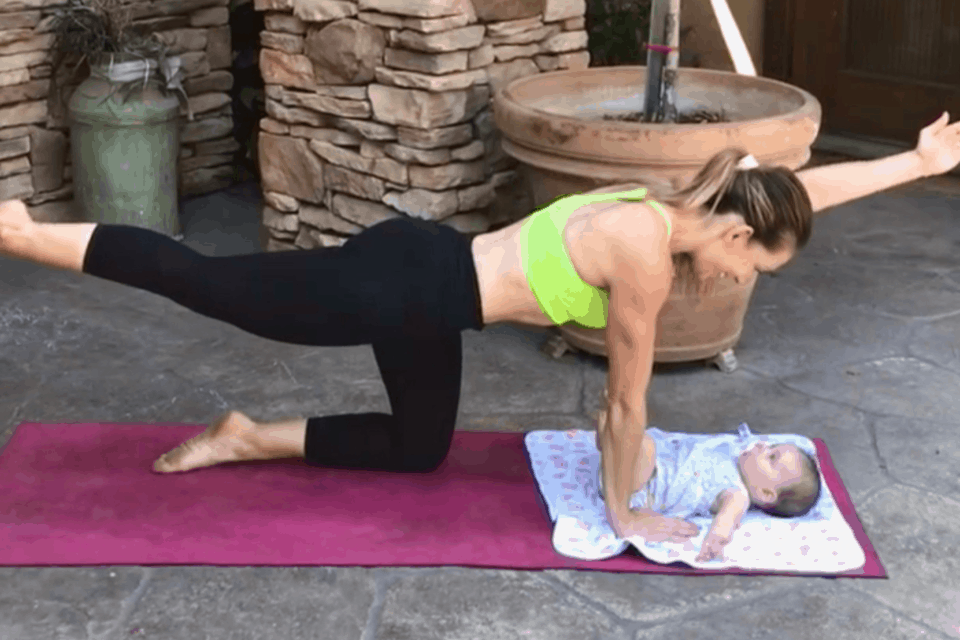
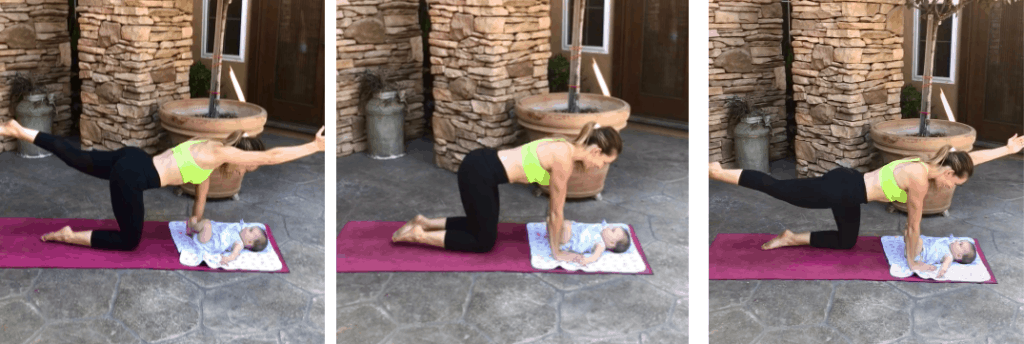
1a. Bird Dogs
- Begin on all fours with your spine neutral and in a table top position
- Your knees shoulder under your hips and your hands under your shoulders.
- Maintain a neutral spine by engaging your abdominal muscles.
- Draw your shoulder down away from your ears and your shoulder blades together.
- With your core strongly engaged, slowly raise your right arm and left leg.
- Focus on keeping your shoulders, hips and spine parallel to the floor and spine
- Hold this position for a few seconds, then lower back down to the starting position.
- Repeat on the opposite side
- Note
- Avoid arching your back or allowing movement in your hips as you lift your arm and leg.
- Firmly squeeze the glute of the lifted leg to help keep you balanced.
Superset #3
- Side Plank Dip
- Side Plank Twists
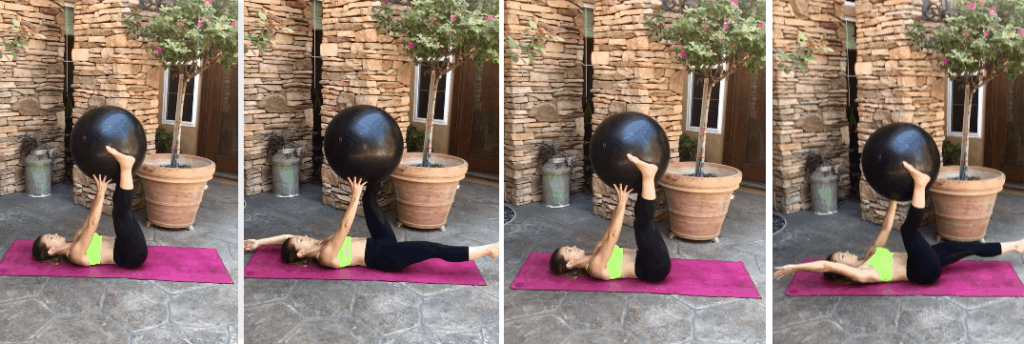
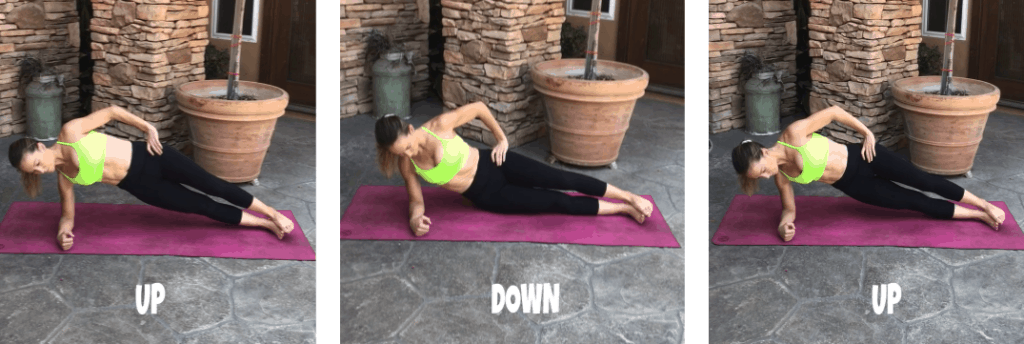
1a. Side Plank Dip
- Start on your right side in a side elbow plank with your legs straight, feet stacked and your right shoulder blade drawing down your back to stabilize your shoulder.
- Inhale and lower your pelvis to the floor. You do not need to go all the way down, just so your hip hovers over the ground.
- Exhale and press your body back up through your waist to lift your pelvis back into the side plank position.
- Continue this slow, up and down motion for the duration of the interval, then switch sides.
1a. Side Plank Dip
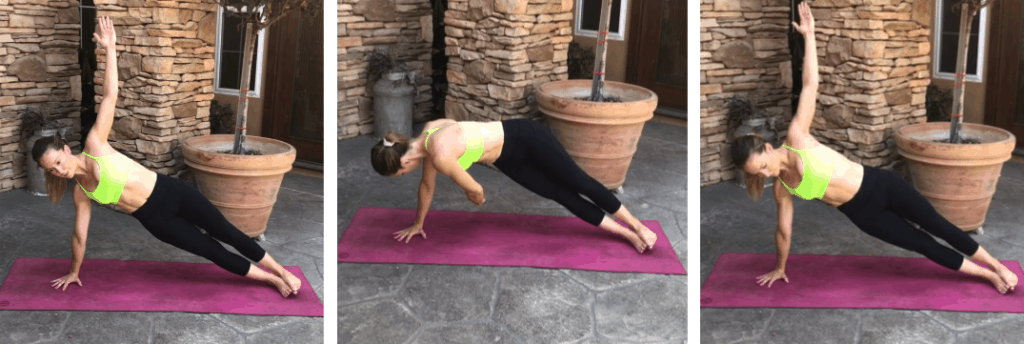
- Start on your right side in a side elbow plank with your legs straight, feet stacked and your right shoulder blade drawing down your back to stabilize your shoulder.
- Note: In the image above, you can see my arm is straight. Do this exercise on your forearm until you have mastered the movement and feel strong in your shoulder an core.
- Place your top hand either behind your neck with elbow toward the ceiling or arm straight up.
- Keeping your bottom oblique strong and hip up, rotate your top elbow or hand down toward the ground and twist almost to your elbow on the ground.
- You may notice you butt hikes up a little as your rotate and thats okay.
- This movement should be very slow and controlled making sure you actually rotate your core to drop your elbow.
- Slowly rotate back to the starting position and repeat for the duration of the interval before switching sides.
Now you are armed with a few exercises to add to your core workout routines to help tone and tighten your tummy after baby!
Disclaimer: The material on this blog and social media associated with this blog are provided for educational purposes only. While I have a Bachelors of Science Degree in Kinesiology-Exercise Science and am a Certified Prenatal/Postnatal Exercises Specialist, this content should not be used for medical advice, diagnosis or treatment, or in place of therapy or medical care. You are responsible if you choose to try any of the workouts or advice given on this blog.
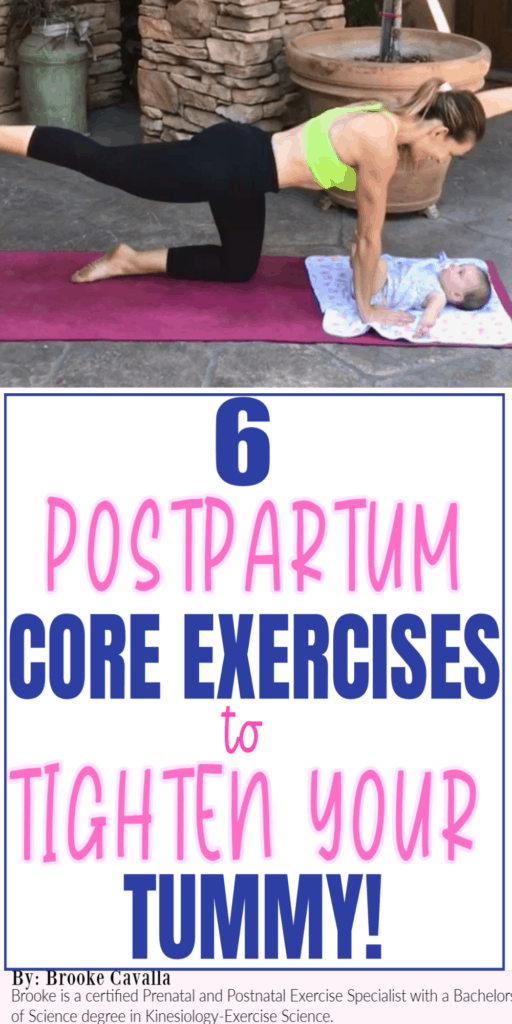
Brooke is a certified Prenatal and Postnatal Exercise Specialist with a Bachelors of Science degree in Kinesiology-Exercise Science. She is also a mom of 3 girls with more than 15 years of experience in health and fitness. Brooke’s goal at Struggles of a Fit Mom is to help motivate, educate and inspire other busy mamas who struggle with finding time, energy and motivation to take care of themselves in the chaos of motherhood.